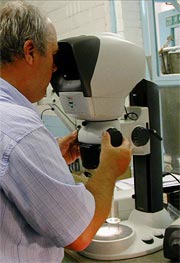
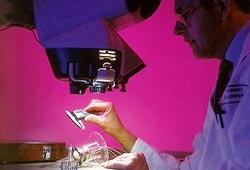
Moores Glassworks are using a Mantis and a Lynx EVO optical inspection system to inspect a wide range of specialised glassware and injection moulded plastic items forming intrinsic components for a variety of applications.
 Glassware manufacture
Moores Glassworks has been designing and manufacturing glassware for industrial applications for nearly forty years. Glassware is manufactured using specially adapted machinery that has been customised by in-house engineers, to allow for the diversity of demands for the specialised components.
Machinery such as lathes are transformed by using new chucks, burners, gearing and controls to completely modify the equipment to produce unique and high quality performance parts. The advantage of having highly skilled and experienced engineers to hand, allows for a custom made service that can respond to client’s requirements quickly and competitively.
A typical and primary component manufactured on site using adapted machinery includes the multi pin base that can be produced in either lead or kodial glass.
Multi pin bases are used in electron tubes and need to be produced in high quantities whilst maintaining the client’s exacting configurations. They are used in electron tubes of all types such as X-ray, photomultiplier, cathode ray, hollow cathode lamps and other specialist tubes.
Meticulous inspection prevents any defects from being dispatched making sure the product is of the highest standard.
“We rely heavily on our inspection processes to detect any defects that have occurred during manufacturing. Only a proportion of our manufacturing process uses machinery, the remaining constitutes a human factor. This requires us to implement a demanding and scrupulous inspection process.”
Optical inspection during the manufacturing process
Drawings and data sheets direct the operator to select the correct die set; this is then fitted to the pinch machine. After the operator has acquired all the relevant materials to complete this manufacturing stage, they apply specialised techniques and experience to accurately produce the quantity required to the client’s exacting configurations. During this process the operator will conduct random inspections to ensure a satisfactory quality level is maintained.
Following this stage of the manufacturing process the stems of the multi pin bases have to be annealed to negate strain. The temperature for this process is nominally 525ºC for a preset duration in a heating chamber within the oven. A strain test is initiated after the annealing process in accordance with the inspection procedures.
Finally the stems are subjected to an acid clean consisting of 32% hydrochloric acid at 78ºC followed by submersion into a bright dip solution of acetic acid, nitric acid and hydrochloric acid. This procedure changes depending on the glass stems and whether they are manufactured using hard or soft glass.
During the manufacturing process there are fundamental elements that need to be executed perfectly due to the nature of working with glass. It is crucial that heat is applied at the exact temperature when joining elements of glass, for example the glass elements of multi pin bases.
The glass stem and the glass rings need to be heated to the right temperature and then ensure there is enough pressure applied to fuse the components. If the glass is not heated to the correct temperature, fusion will not initiate and capillaries can form in the glass. If capillaries are formed during this process, it represents a possible leakage point so that when they are finally sealed into the bulb the capillary causes the bulb to become soft. This in turn can cause all of the bulbs in a given panel sector to fail.
Productivity improved
The inspection criteria includes checking the joint of the stem as well as examining for other defects such as bent or misplaced pins, bubbles, cracks, chips or black lines within the glass to metal seals (a.k.a. dimples) etc. To do this Moores have invested in two Mantis stereo viewers and a Lynx stereo optical inspection system.
“As we pride ourselves on providing a fast turnaround time for our customers, we need to rely on our inspection equipment to be accurate and easy to use. Furthermore, the inspection systems from Vision Engineering provide the team with ergonomic benefits with the ‘eyepiece-less’ technology, improving productivity.”
With quality regulations becoming increasingly stringent plus the pressure to increase productivity, you have to be able to rely on your quality processes and the tools and equipment that enable you to implement such procedures.
Moore’s Glassworks have incorporated the use of two stereo optical inspection systems from Vision Engineering benefiting the operators with ergonomic advantages such as fatigue free viewing.
A wide range of glass products for industry applications are inspected with the eyepiece-less microscopes. With Moore’s Glassworks continuing to expand their product range and provide clients with a diversity of components with complex configurations, the inspection process will continue to remain an invaluable procedure in the quality control of their products.


